Thursday, May 20, 2010

Final Project!!!

So this will be the last post of this series unless I decide to do this again next semester. I really don't know the format of next semesters studio though so I don't know if I will be able to post a blog.

Now that you've seen the SketchUp drawings, you'll recognize my final drawings. I traced over the SketchUp drawings I printed out and added color and whatnot. Here's my process with a variety of different drawings because for some reason I didn't do a complete process with one drawing:

Again, I traced over the entire picture using special types of ink pens. They come in a pack of six and vary in size so the thicker the line, the more important or prominent the building or whatnot. I again attempted to use a straight edge for the drawing but if you look really closely, only a few lines are actually parallel to the straight edge.

After I inked the entire image I added color. Here's the beginning of a perspective with the trees half way colored. I love coloring trees for some reason haha.

Here is the finished perspective. Unlike my previous project I did not completely color the sidewalk or road so it wouldn't be overpowering.


Just for comparison, this is a finished elevation above the printed sketchup drawing.

And here is my desk where all this work took place. I would ask someone to guess what movie I was watching but the box is right next to the computer =/

All of this lead to a 24x36 inch board. Instead of posting each individual drawing I'll just post the whole board. If you click on the picture it should get pretty large so you can see the individual drawings.


I'm pretty proud of this bad boy. I think when compared to my previous project I've really improved. Actually, this is the first final board I can look at and feel proud of my work. I think using SketchUp and understanding how to work the program really helped too. These drawings look so different than last years when we couldn't use computers at all (or we weren't suppose to).

Anyway, I want to thank you guys for reading this blogs, the feedback really helps. And it's nice for people outside of urban planning and architecture look at my work since in reality, I would show this to the community rather than fellow planners. If I can I'll continue this next semester-- I think it's more computer oriented than drawings though, I don't know.

And look for a post in the possible near-future. I'm thinking about posting my NaNoWriMo story online so I'll give you guys a link if you want to read it too.

Thanks again!

Monday, May 10, 2010

Road to the Final: Sketchup

Alright guys, the final project is now officially finished. There's only going to be two more posts, this one and then the final design/drawing one.

Once I had my final idea on paper, I went to work on the computer. I used a program called Sketchup by Google. It's pretty good for a free program. I like to compare it to the MS Paint version of Photoshop. It does the job but it doesn't come close to AutoCad...actually that may be a little harsh comparison. Sketchup can actually do quite a lot for being a free program but AutoCad just takes it to the next level. Plus, AutoCad looks confusing (in the few cases I've watched my friend use it) and Sketchup is pretty user-friendly and does the job nicely :)

Basically, I can create models in sketchup. Houses, trees, sidewalks, buildings...basically anything. And another cool feature is the 3D Warehouse. I didn't create any of the trees, cars, people, basketball courts, etc because others already did. I simply downloaded the models onto my model. It's a huge time saver. I can also figure out the square footage of a building which was extremely helpful as well since we had a minimum requirement for the square footage of retail, office, etc.

So I created my final design in sketchup. First I just created boxes, but as I figured out what I was going to draw, I added details to those shots. Every picture I will show have added details. Trust me, the majority of the buildings are blank, simple boxes.

It took me about a week from the beginning to end of my 'sketchup phase.' Sketchup has this useful feature that allows a photo from Google Earth to be imported, so that's how I got the building and lot size. I didn't have to do any measuring :) Here is what my design looked like about halfway with the Google Earth background. I managed to delete the background somewhere along the way and didn't know how to get it back so there isn't a picture with the final design and Google Earth.


It took me a while to figure out a final design, mostly because of the parking. There was a minimum requirement of parking for x amount of retail and x amount of units. So, I had to balance between figuring out the number of parking with the amount of retail/office/residential. This took me about three days =p. Then I went to work with the details for my final drawings. These are the final pictures/screen shots from sketchup:


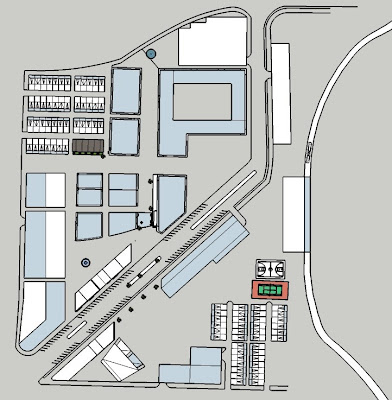
This is the site plan, sorry it's lopsided. One of the hard, or annoying, parts of this project was no two buildings were exactly parallel or perpendicular to each other because the buildings I kept from the current site weren't. Fun tidbit =P


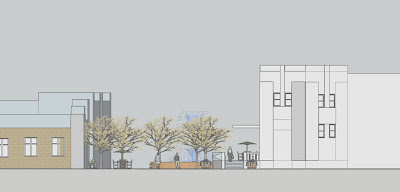
This is my first elevation. It shows a pedestrian corridor with shops and restaurants between two buildings.

This is a section cut (section cuts go through buildings, elevations don't. Sadly, I forgot that fact on my final board and named them all section cuts =p). It shows a theater with seating and some of the store fronts in the background.

This is an elevation of townhouses, next to a retail building (right). Yep, that's about it.


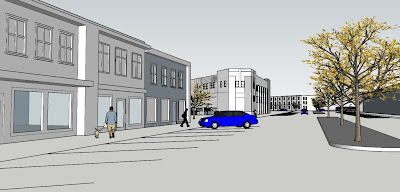
This is a perspective that shows my streetscape. As I said before, the people, trees, and cars were not created by me. Everything else was though.


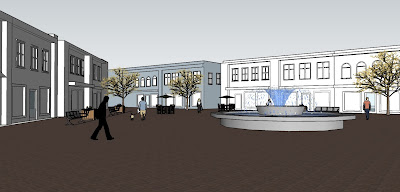
This is another perspective that I actually didn't use in my final board because there wasn't a need for it. It shows a plaza and fountain in a retail, mixed-use, shopping area.


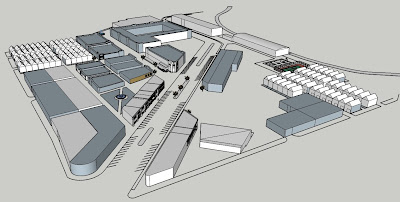
This is technically another perspective. Usually when showing an entire site, you use an axonometric or isometric to show elevation. On sketchup, it's slightly difficult to get the view you want and still have it be an axon or iso so I kind of just picked a view and went with it. It gives the same idea as an axon or iso.


And that is it. Those are the images and views I made with sketchup. I then printed these out and used them as a template for my drawings. The next post will show this and my final board :)

Thanks for reading!